
Adding a Menu
1. From your WordPress Dashboard navigate to Appearance > Customize
2. In the left sidebar of the Customizer select Menus
![]() 3. Click on the button labeled Add a Menu
3. Click on the button labeled Add a Menu
![]() 4. After clicking on the Add a Menu button a textbox should pop up prompting you to enter the menu’s name, enter the menu name then click Create Menu
4. After clicking on the Add a Menu button a textbox should pop up prompting you to enter the menu’s name, enter the menu name then click Create Menu
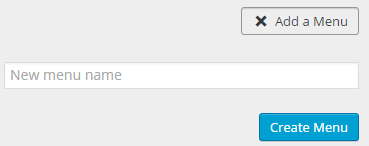 Note: To cancel this process click Add a Menu again while it has an x on it.
5. Now we need to add items to the menu, to add pages:
a. Click on Add Items
![]()
b. A large menu of items should have popped up, here you can select a section and select items from the section, or you can use the search box at the top to find what you are looking for. Clicking on an item will add it to your menu
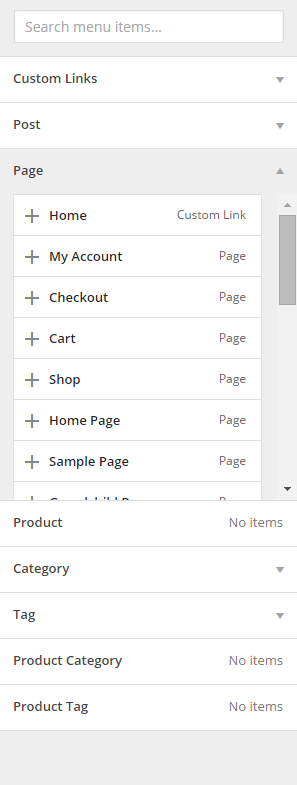
c. To stop adding items click on the Add Items button again
![]()
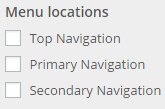
6. Next you need to set the menu to a specific menu location
a. Under the label Menu locations select every menu location you would like your menu to be
7. Lastly we need to set the menu options
a. Under the label Menu options you can either select the checkbox to let new top-level pages get automatically added to the menu or leave it unchecked

8. When you are finished click on Save & Publish in the top-right corner of the sidebar
![]()
Changing the Name of a Menu
1. From your WordPress Dashboard navigate to Appearance > Customize
2. In the left sidebar of the Customizer select Menus
![]() 3. Next select the menu that you would like to edit (mine is called Menu)
3. Next select the menu that you would like to edit (mine is called Menu)
![]()
4. To change the name of the menu type the name you would like the menu to have in the textbox at the top of the sidebar
![]() 5. When you are finished click on Save & Publish in the top-right corner of the sidebar
5. When you are finished click on Save & Publish in the top-right corner of the sidebar
![]()
Adding and Removing Items from an Existing Menu
1. From your WordPress Dashboard navigate to Appearance > Customize
2. In the left sidebar of the Customizer select Menus
![]() 3. Next select the menu that you would like to edit (mine is called Menu)
3. Next select the menu that you would like to edit (mine is called Menu)
![]() 4. To add items to your menu:
4. To add items to your menu:
a. Click on Add Items
![]()
b. A large menu of items should have popped up, here you can select a section and select items from the section, or you can use the search box at the top to find what you are looking for. Clicking on an item will add it to your menu
c. To stop adding items click on the Add Items button again
![]()
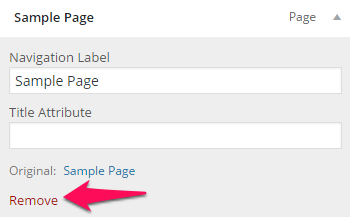
5. To remove items from your menu:
a. Click on the menu item you would like to remove to open up the item’s options
b. Click the button labeled Remove
6. When you are finished click on Save & Publish in the top-right corner of the sidebar
![]()
Reordering Items in a Menu
1. From your WordPress Dashboard navigate to Appearance > Customize
2. In the left sidebar of the Customizer select Menus
![]() 3. Next select the menu that you would like to edit (mine is called Menu)
3. Next select the menu that you would like to edit (mine is called Menu)
![]() 4. There are two ways to reorder items in a menu:
4. There are two ways to reorder items in a menu:
a. Click and Drag Method
i. Left click and hold down on the item you would like to move
ii. Drag the item to wherever in the menu you would like it to go
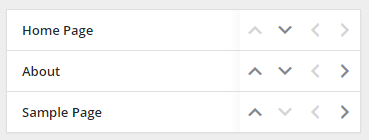
b. Reorder Button Method
i. Click on the button labeled Reorder
![]()
ii. Next to each of your items there should be arrows. You can now reorder your items by clicking on the dark gray arrows
5. When you are finished click on Save & Publish in the top-right corner of the sidebar
![]()
Setting a Menu to a Specific Menu Location
1. From your WordPress Dashboard navigate to Appearance > Customize
2. In the left sidebar of the Customizer select Menus
![]() 3. Next select the menu that you would like to edit (mine is called Menu)
3. Next select the menu that you would like to edit (mine is called Menu)
![]() 4. Under the label Menu locations select every menu location you would like your menu to be
4. Under the label Menu locations select every menu location you would like your menu to be
5. When you are finished click on Save & Publish in the top-right corner of the sidebar
![]()
Menu Options
1. From your WordPress Dashboard navigate to Appearance > Customize
2. In the left sidebar of the Customizer select Menus
![]() 3. Next select the menu that you would like to edit (mine is called Menu)
3. Next select the menu that you would like to edit (mine is called Menu)
![]() 4. Under the label Menu options you can either select the checkbox to let new top-level pages get automatically added to the menu or leave it unchecked
4. Under the label Menu options you can either select the checkbox to let new top-level pages get automatically added to the menu or leave it unchecked
5. When you are finished click on Save & Publish in the top-right corner of the sidebar
![]()