
With Baton and Note activated Note will get two new display layouts called Baton Hero and Baton Features.
Baton Hero
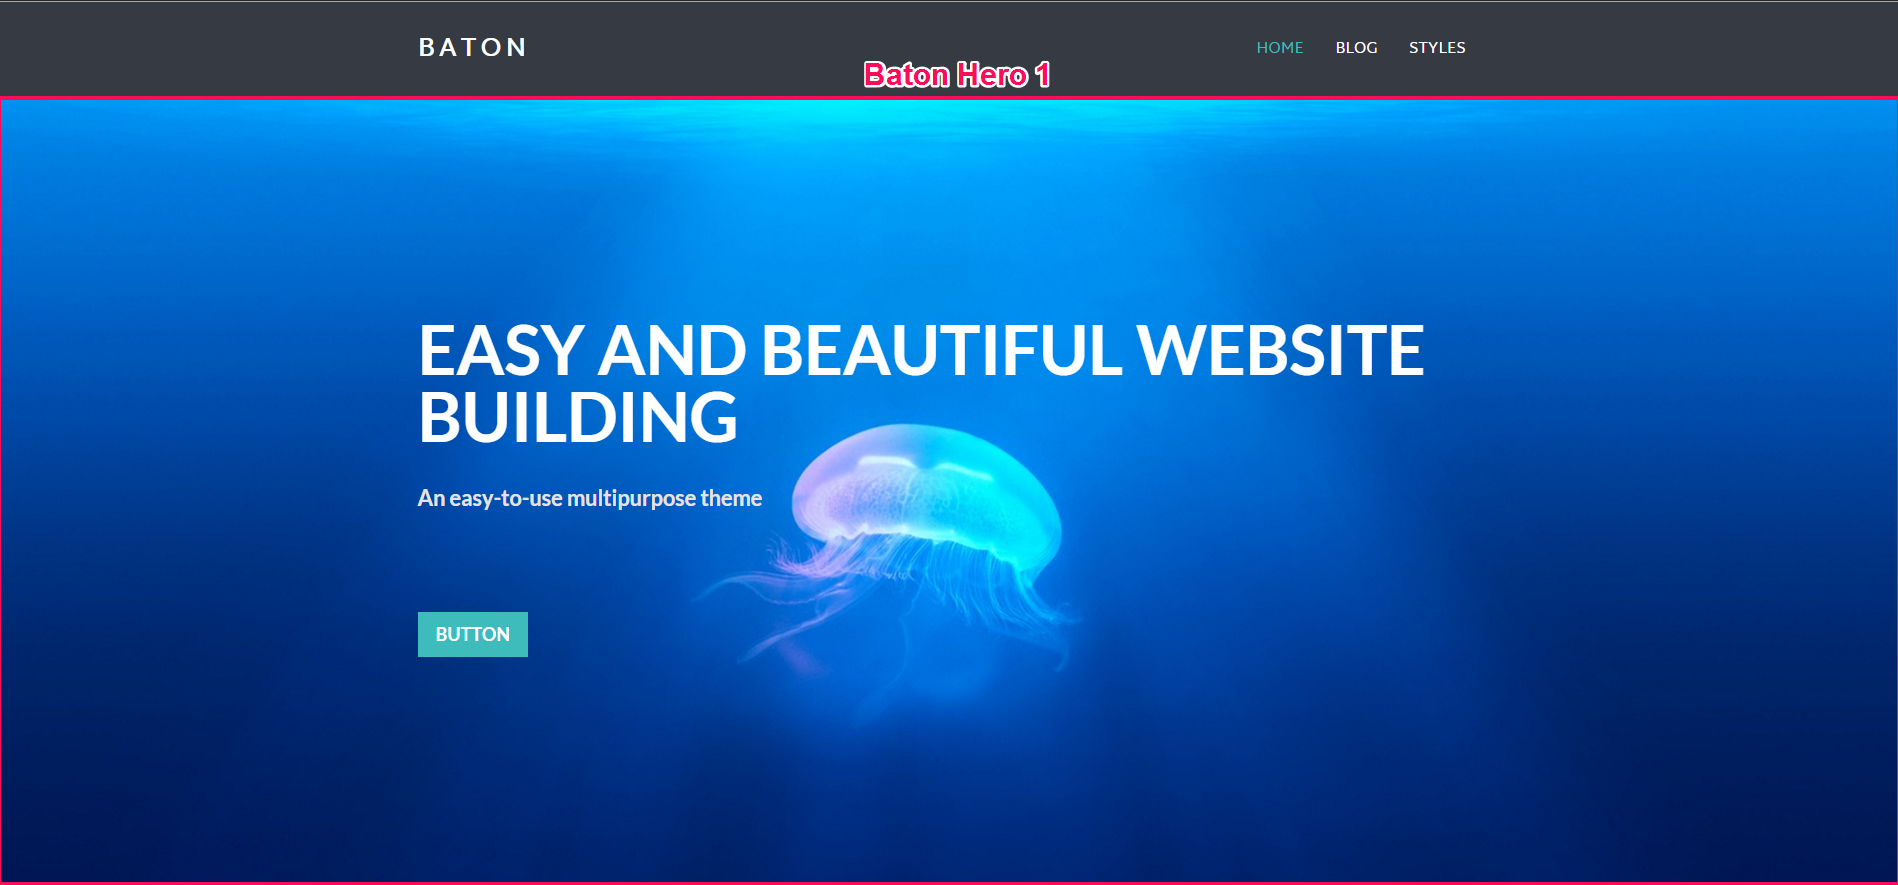
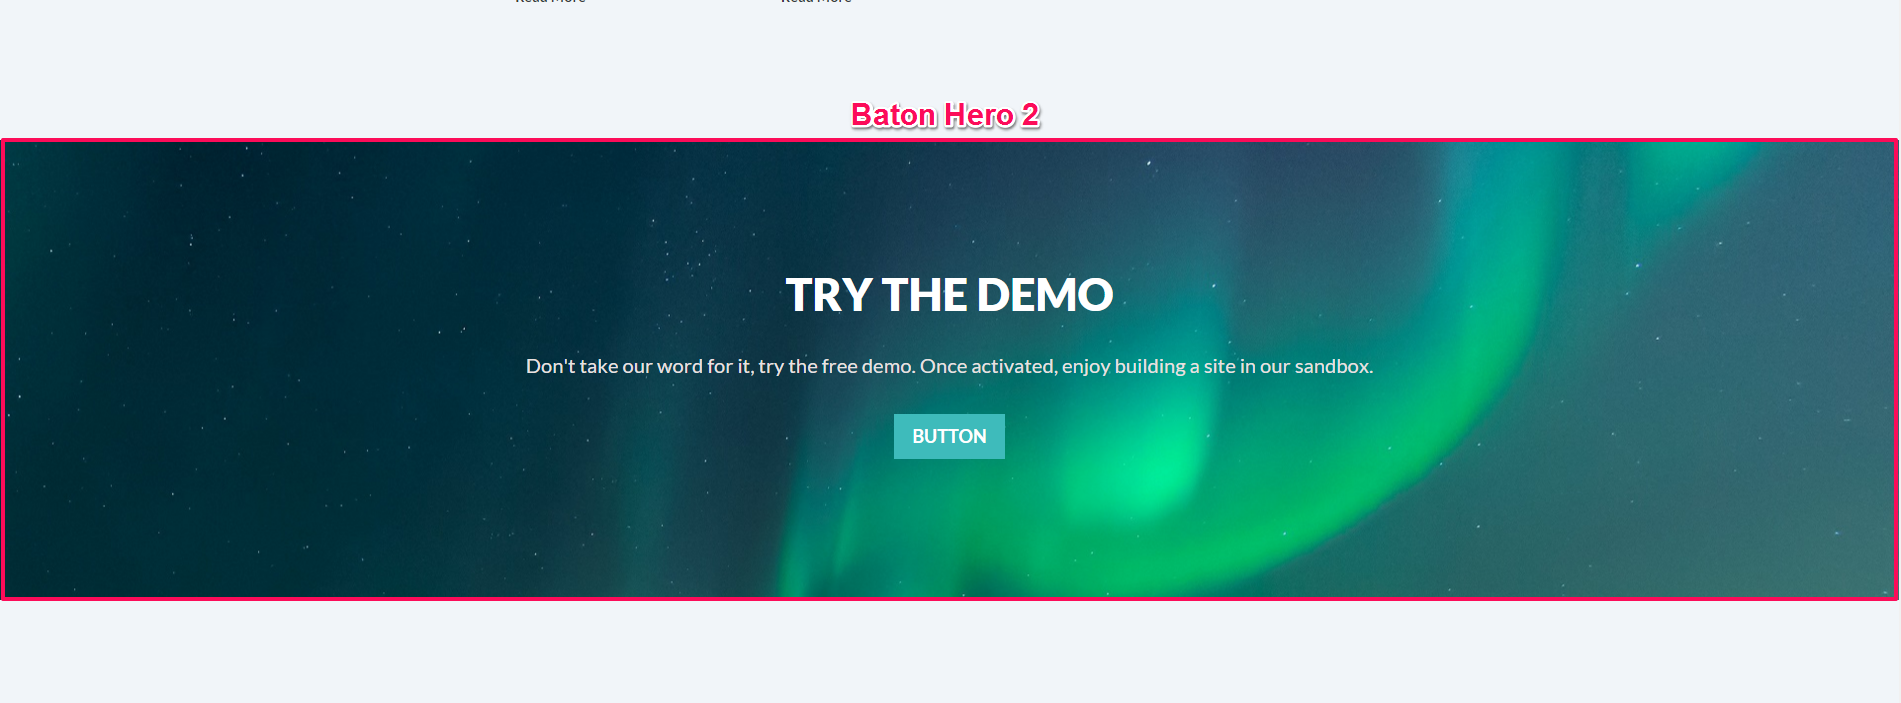
Baton Hero adds some new functionality as well as new layouts to Note. You can also format links to be buttons, and set a background image to your Note Widget. There are two types of Baton Hero widgets, Baton Hero 1 and Baton Hero 2. The main difference between Baton Hero 1 and 2 is the layout and alignment of text (see screenshots below).
Note: Baton Hero Widgets are designed to be used in the Front Page Sidebar, but can be used elsewhere.
Baton Hero 1 Example
Baton Hero 2 Example
Creating a Baton Hero Widget from the WordPress Customizer
1. Create a Note widget, but do not add any content to the widget just yet.
Note: If you are unsure how to create a Note Widget, see here.
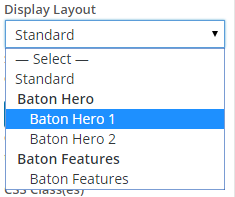
2. On the left-hand sidebar of the Customizer in the Note Widget settings under Display Layout there should be a dropdown, under that dropdown you can choose Baton Hero 1 or Baton Hero 2. Select whichever one you prefer. Now you can add content if you’d like.
3. Click the Save & Publish button in the top right corner of the Customizer sidebar.
![]()
New Formatting Options with Baton Hero
Baton Hero adds some new formatting options to your Note Widgets. With Baton Hero you can do things like:
- Set a background image to a Note Widget
- Set a background color to a text element
- Format links to look like buttons
Note: You must be in the Customizer to use any of these formatting options.
Setting a Background Image to a Baton Hero Note Widget
1. From the WordPress Dashboard navigate to Appearance > Customize
2. Hover over your Note Widget and above your widget should be a box with a pencil icon and an image icon in it, click on the image icon.
![]()
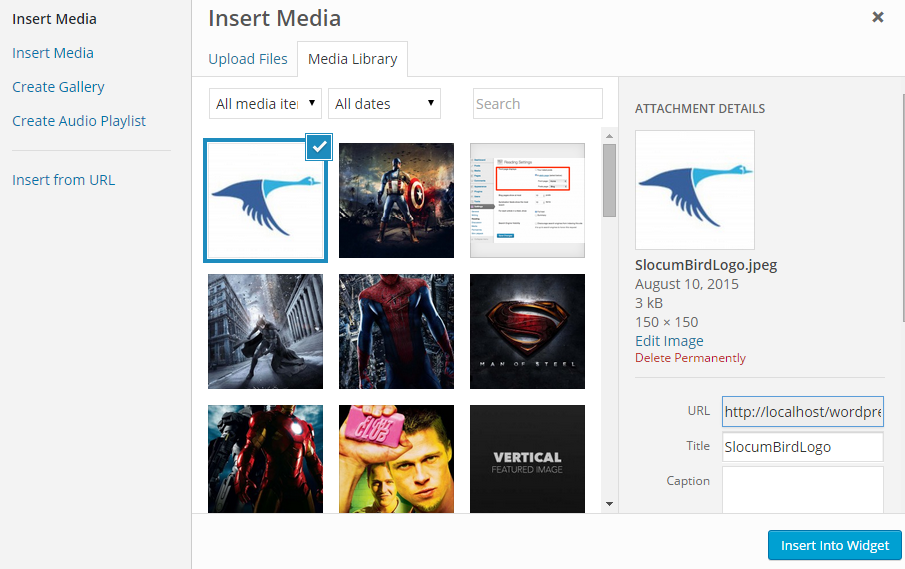
3. From there you can select any image you want from your Media Library, or you could upload a new image.
4. Click on the Save button in the bottom-right corner of the window.
![]()
5. Click the Save & Publish button in the top right corner of the Customizer sidebar.
![]()
Formatting Links to Look Like Buttons (Note plugin only)
1. From the WordPress Dashboard navigate to Appearance > Customize
2. Select the link in your Note widget that you would like to be a button by highlighting it.
![]()
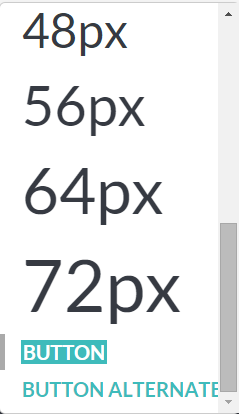
3. After you select your link an options bar should appear above the text. Click on the Formats dropdown menu.
![]()
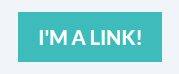
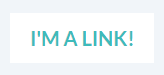
4. Click on the last option labeled BUTTON or BUTTON ALTERNATE.
Note; BUTTON and BUTTON ALTERNATE will not be an option if the selected text is not a link or if the Note widget is not a Baton Hero widget.
5. Click the Save & Publish button in the top right corner of the Customizer sidebar.
![]()
Button
Button Alternate
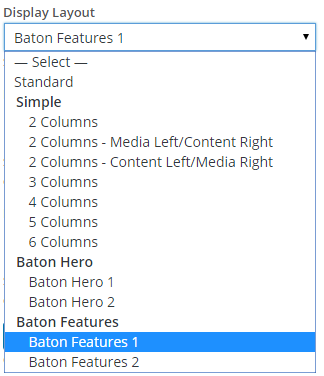
Baton Features
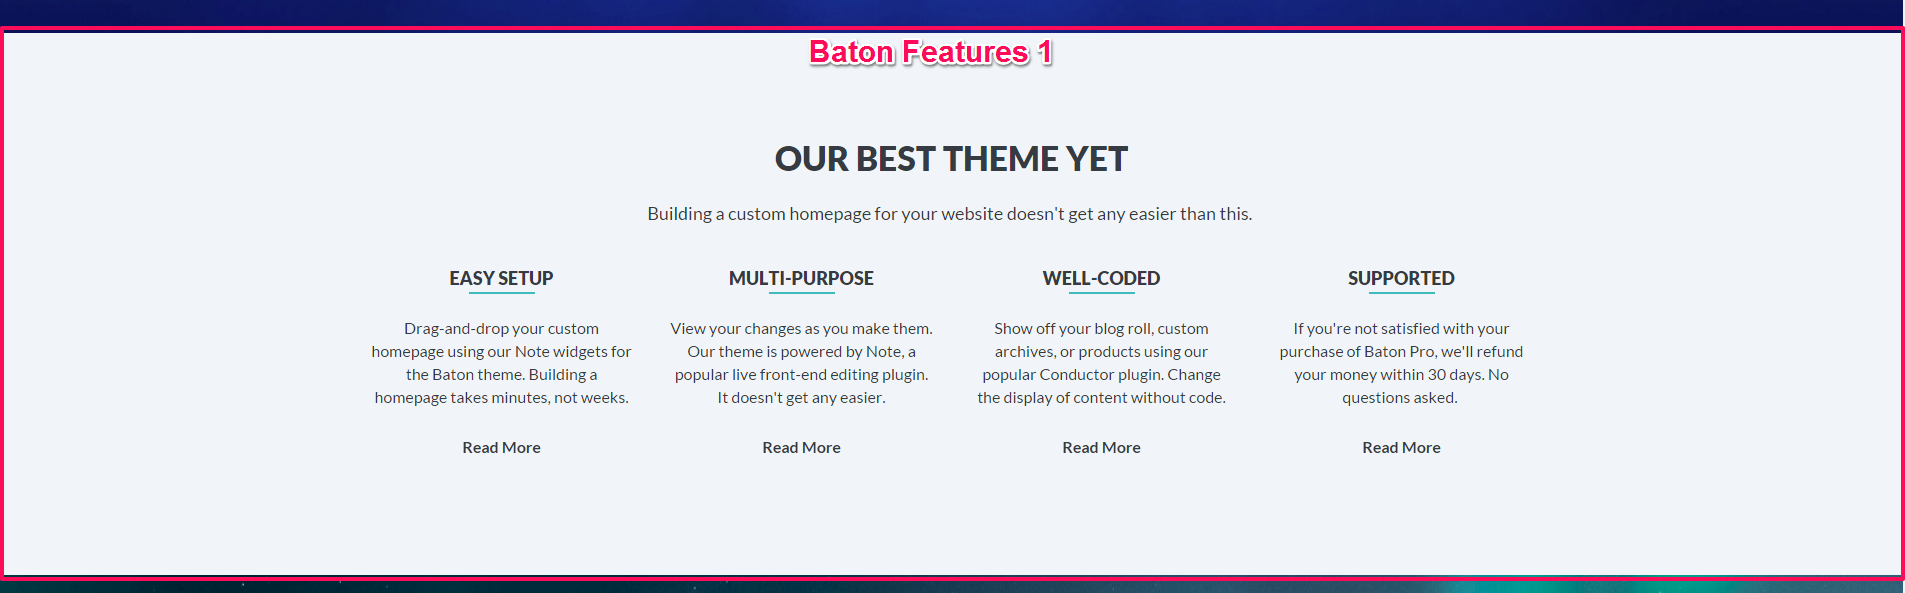
Baton Features is another display for Note that comes with Baton. This display lets you feature something at the top of the widget, and this display lets you list features about what you are featuring. See the example screenshot below for more information about the layout of this display.
Baton Features 1 Example
Baton Features 2 Example

Creating a Baton Features Widget from the WordPress Customizer
1. Create a Note widget, but do not add any content to the widget just yet.
Note: If you are unsure how to create a Note Widget, see here.
2. On the left-hand sidebar of the Customizer in the Note Widget settings under Display Layout there should be a dropdown, under that dropdown you can choose Baton Features. Now you can add content if you’d like.
3. Click the Save & Publish button in the top right corner of the Customizer sidebar.
![]()
Changing the Number of Columns in a Baton Features Widget
1. From the WordPress Dashboard navigate to Appearance > Customize
2. In the Customizer’s left sidebar open the Baton Features widget you would like to change the amount of columns by left clicking on it.
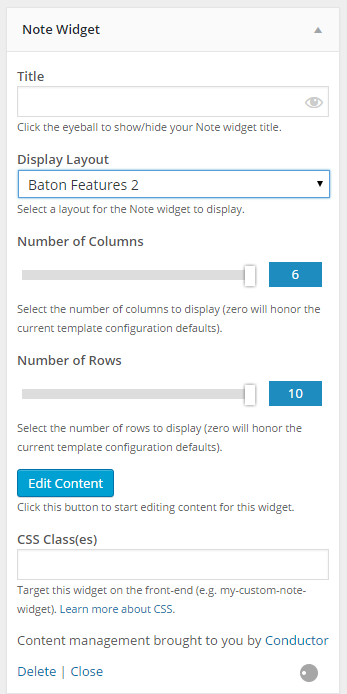
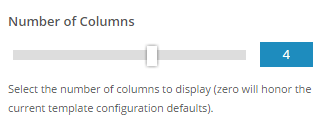
3. Under the section labeled Number of Columns you can change how many columns your Note Widget has by sliding the slider. A Baton Features widget can have a minimum of 1 column and a maximum of 6 columns.
4. Click the Save & Publish button in the top right corner in the Customizer sidebar.
![]()
Changing the Number of Rows in a Baton Features Widget
1. From the WordPress Dashboard navigate to Appearance > Customize
2. In the Customizer’s left sidebar open the Baton Features widget you would like to change the amount of rows by left clicking on it.

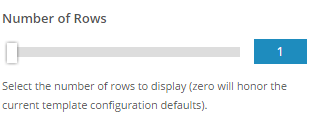
3. Under the section labeled Number of Rows you can change how many columns your Note Widget has by sliding the slider. A Baton Features widget can have a minimum of 1 row and a maximum of 10 rows.
4. Click the Save & Publish button in the top right corner in the Customizer sidebar.
![]()