
Call To Action Widget
A call to action is a great way to draw the attention of your viewers to a new feature, sale, or notice. Located in the header of every page, a call to action will immediately catch your viewer’s eye.

Using the Widgets Subpanel
1. From the WordPress dashboard, navigate to Appearance > Widgets
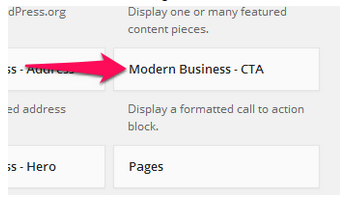
2. Locate the Modern Business – CTA widget
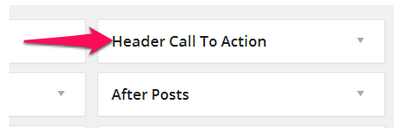
3. Click and drag the Modern Business – CTA widget to the Header Call to Action space
Note: You make place the widget in any of the available spaces, but we recommend that calls to action be placed in the Header Call to Action space
4. Enter a title and call to action for the viewer
5. Click Save at the bottom of the widget menu
Using the Customizer
1. From the dashboard navigate to Appearance > Customize
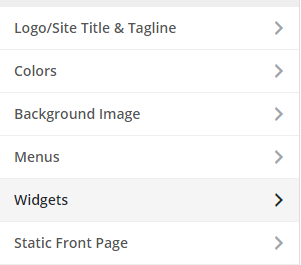
2. In the left sidebar click the Widgets option
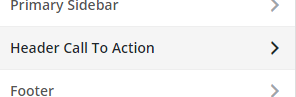
3. Select the Header Call to Action section
4. Click the button labeled Add a Widget
5. When the menu pops up click on the Modern Business – CTA widget
6. Enter a title and a call to action for the viewer
7. Click the Save & Publish button in the top-right corner of the left sidebar
Address Widget
The address widget is a great way to show your users how they can contact you. In fact, you don’t even have to use the address widget for addresses! Phone numbers, email addresses, or any other form of contact information works well here.

Using the Widgets Subpanel
1. From the WordPress dashboard, navigate to Appearance > Widgets
2. Locate the Modern Business – Address widget
3. Click and drag the Modern Business – Address widget to the Header Call to Action space
Note: You may place the widget in any of the available spaces, but we recommend the address widget be placed in the Header Call to Action space
4. Enter a title and any contact info as you see fit
5. Click Save at the bottom of the widget menu
Using the Customizer
1. From the WordPress dashboard, navigate to Appearance > Customize
2. In the left sidebar click the Widgets option
3. Select the Header Call to Action section
Note: You may place the widget in any of the available spaces, but we recommend the address widget be placed in the Header Call to Action space
4. Click on the Add a Widget button
5. When the menu pops up click on the Modern Business – Address widget
6. Enter the title and any contact info as you see fit
7. Click the Save & Publish button at the top-right of the sidebar
Hero Widget
The hero widget is a great way to display a notice to all viewers, regardless of what page they are viewing. Effectively, the Hero widget is simply a longer version of the CTA widget, without the formatting that makes it stand out.

Using the Widgets Subpanel
1. From the WordPress dashboard, navigate to Appearance > Widgets
2. Locate the Modern Business – Hero widget
3. Click and drag the Modern Business – Hero widget to the Header Call to Action space
Note: You may place the widget in any of the available spaces, but we recommend the hero widget be placed in the Header Call to Action space
4. Enter a title and any other text as you see fit
5. Click Save at the bottom of the widget menu
Using the Customizer
1. From the WordPress dashboard, navigate to Appearance > Customize
2. In the left sidebar select the Widgets option
3. Select the Header Call to Action section
Note: You may place the widget in any of the available spaces, but we recommend the hero widget be placed in the Header Call to Action space.
4. Enter the title and any other text as you see fit
5. Click the Save & Publish button in the top-right corner of the sidebar
Social Media Widget
As more and more people begin using social media, you may want to provide a simple way for them to connect with you. The Social Media Widget gives allows viewers to connect with you through your various social media outlets by providing visually appealing links to them.

Using the Widgets Subpanel
1. From the WordPress dashboard, navigate to Appearance > Widgets
2. Locate the Social Media Widget
3. Click and drag the Social Media Widget to one of the eight available widget spaces
4. Enter a title
5. Click Save at the bottom of the widget menu
Using the Customizer
1. From the WordPress dashboard, navigate to Appearance > Customize
2. In the left sidebar select the Widgets option
3. Select whichever area you would like the social media widget to be
4. Click on the button labeled Add a Widget
5. When the menu pops up select the widget labeled Social Media Widget
6. Enter a title
7. Click Save & Publish in the top-right of the sidebar