In the WordPress Customizer there is an option on the left sidebar called Content. This is the section where all of the content can get styled. Below are the four sections under Content that will let you customize the look of your content.
Colors
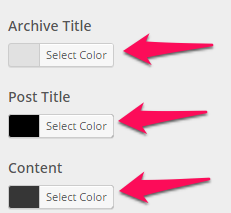
Under the Colors tab there are three colors to be edited:
- Archive Title
- The title that goes with post archives.
- Post TItle
- The title of posts.
- Content
- The body of posts, paragraphs, any form of content.
To change any of these colors:
1. From the WordPress Dashboard navigate to Appearance > Customize
2. On the left sidebar select Content

4. Click on Select Color under any of the three options

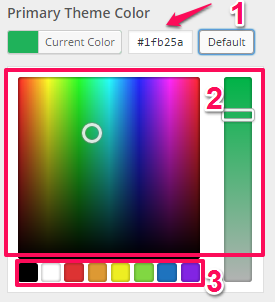
5. A color palette should pop up. When it does you can either:
a. Select a color by inserting a hex value
b. Drag the cursor and slider around in the color panels to get an exact color
c. Choose from the default colors at the bottom
d. Click on Default to get the default color scheme

6. Click Save & Publish in the top-right corner of the Customizer sidebar
Headings
Under Headings you can change the size (in pixels) and font family of each of the six headings.
Changing the Size of a Heading
1. From your WordPress Dashboard navigate to Appearance > Customize
2. On the left sidebar select Content

4. Scroll to whichever heading you would like to change the size of
5. To change the size you can either
a. Type in a number in the textbox
b. Use the up and down arrows in the textbox to add one or subtract one from the current size

6. Click Save & Publish in the top-right corner of the Customizer sidebar

Changing the Font Family of a Heading
1. From your WordPress Dashboard navigate to Appearance > Customize
2. On the left sidebar select Content

4. Scroll to whichever heading you would like to change the font of
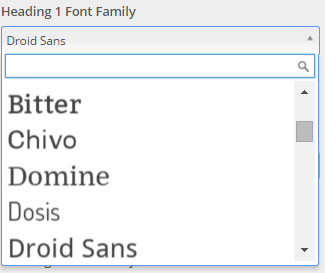
5. Select a font under the dropdown or type a font into the search box under the Heading # Font Family label

6. Click Save & Publish in the top-right corner of the Customizer sidebar
Body
With the Body option you can change the font size and family of the main content.
Changing the Font Size of the Body
1. From your WordPress Dashboard navigate to Appearance > Customize
2. On the left sidebar select Content

4. To change the size you can either:
a. Type in a number in the textbox under the Body Font Size label
b. Use the up and down arrows in the textbox to add one or subtract one from the current size

5. Click Save & Publish in the top-right corner of the Customizer sidebar
Changing the Font Family of the Body
1. From your WordPress Dashboard navigate to Appearance > Customize
2. On the left sidebar select Content

4. Select a font under the dropdown or type a font into the search box under the Body Font Family label
5. Click Save & Publish in the top-right corner of the Customizer sidebar
Content
With the Content option you can change the background color/image of the main content.
Changing the Background Color of the Content
1. From your WordPress Dashboard navigate to Appearance > Customize
2. On the left sidebar select Content
![]()
4. Click Select Color under the Content Background Color option

5. A color palette should pop up. When it does you can either:
a. Select a color by inserting a hex value
b. Drag the cursor and slider around in the color panels to get an exact color
c. Choose from the default colors at the bottom
d. Click on Default to get the default color scheme

6. Click Save & Publish in the top-right corner of the Customizer sidebar

Changing the Background Image of the Content
1. From your WordPress Dashboard navigate to Appearance > Customize
2. On the left sidebar select Content
![]()
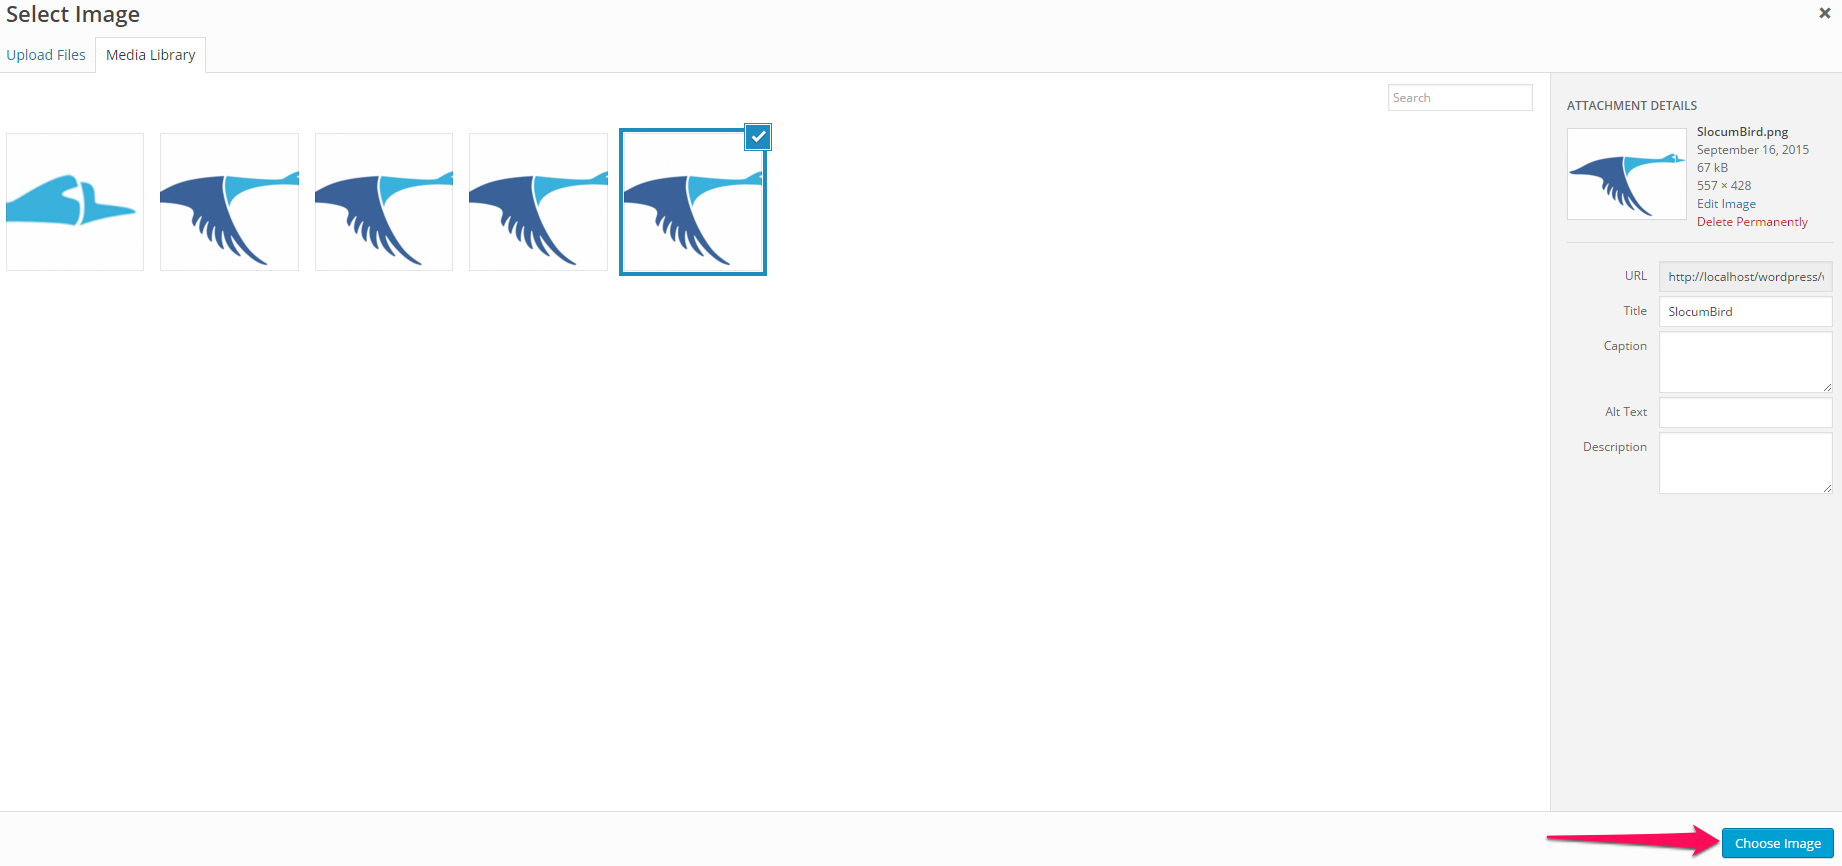
4. Click on the Select Image button under the Content Background Image label

5. Select an image in your Media Library and click the Choose Image button in the bottom-right corner

6. Now you can edit the Background Options, see Other Background Image Options
7. Click Save & Publish in the top-right corner of the Customizer sidebar
